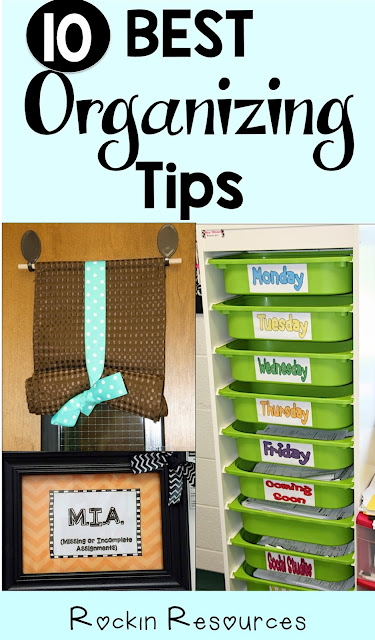
Although I've been teaching for a bajillion years, I still find that the littlest organizing tip goes a long way! I am going to mix a few of my all time favorites with some of my new found treasures! This is going to make my classroom run as smooth as silk!
1. Class Mailboxes- I have used these for years and they are best! I assign each student a number in alphabetical order. When turning in papers, I have students place the assignment in their mail slot and I can quickly check to see who didn't turn one in. Then I can collect them in number order which makes it easy for entering grades! Oh yeah! I'm doing the happy dance. Click for a link to where you can find it in Amazon! I like the wood ones the best!
I also have a mailbox. This is used for student notes as well as lunch money, bus notes. and other important information. In the past, students put them on my desk, but if you saw my desk, you would see why I needed a new plan! After misplacing a few items, it was time for a change! I got this adorable designed box from Kirklands for 50% off and added a label to it. Click on the picture for a link to similar ones from Pioneer.
2. Door Window Shade- Erin across the hall found this on Pinterest this year! Another colleague, Meredith, made the shade for all of us. Then we bought dowels, hooks, and ribbon at Walmart. This is super effective for Lockdowns! All you have to do is pull the bow and the shade falls down! LOVE it! Click for a link to the polka-dot ribbon!
3. Leaving the Room Sign- Also on the inside of my door, I posted this sign. I laminated the colorful section and made copies of the signing part. Then I tied a string to a pen and taped it to the door. When students leave the room, they need to sign out. Then when they return, they cross it off. This is especially effective if we have a fire drill. I can quickly check the list as we are lining up! Although I usually remember who is out, there is always a panic as I'm counting heads and checking my clipboard for students at a quick second.
4. Class Library- To keep order for my class books, I bought these baskets and labeled chapter books according to their genre. I also place color-coded dots on the books with a letter so they can easily be placed back in the correct basket. For example- M- Mystery. Below there are fiction picture books on one side and nonfiction picture books on the other side. Click the picture for a link to the baskets!
5. Daily Lessons- This is one of my favorite organizing tips of all time! My partner, Roberta, found it at Ikea in the children's department. I can place all the worksheets, plans, even books needed in these bins for each day of the week. Below the days of the week, I place extra lessons or lessons coming in the future for my subjects. Boy oh boy does this keep me organized!!!!! Click on the picture for a link to the white frame! Click HERE for the green drawers.
6. Jobs- I have two classes. I assign two students from each class to a job. That way, if they are absent or out of the room, there is someone to perform the job. I have two students from each class on vacation. I allow them to sit back and watch others work! (I even allow them to put their feet up, ha!) My jobs include: Geek Squad, Teacher Assistant, Cafe Team, Clean Team, Pencil Team, Board Team, Library Team, Cubbie Team, Library Team, Chairs Team, Floor Team, Supplies Team. There is a description of their job duties on the chart. I have students on the same job for the whole month. That way I can keep track of their duties! Then we rotate! Click on the pic below for an editable version!
Or keep them square:
Another idea for team work: I place 4 different colors on the desks. Below, you will see a pink cloud. That is the color who will be the group helper for the day or week or month. I move them whenever I feel like it!
7. Missing Work Board- MIA- Missing/Incomplete Assignments. I place this on the white board so I can write names under it. No Names- I clip any no names to this board. Absent- If they are absent, I clip their work. Incomplete work- I clip it. In the middle there is a "Look What I Did" board. I found this at Kirklands and although it doesn't go with the missing assignments, it was a space on the wall so I will highlight some Rockin Work!
This is a photo frame with magnets on the back and bow in corner.
I created the No Name and Absent Boards by painting an 11X 14 art canvas and hot glued the clothespins! Then I hot glued them to the wall. Click for a link to a Art Canvas- 7-pack.
Below to the left is where I place incomplete work. I took an old white board and covered it with wrapping paper! To the right, I place extra worksheets incase a student messes up or loses work.
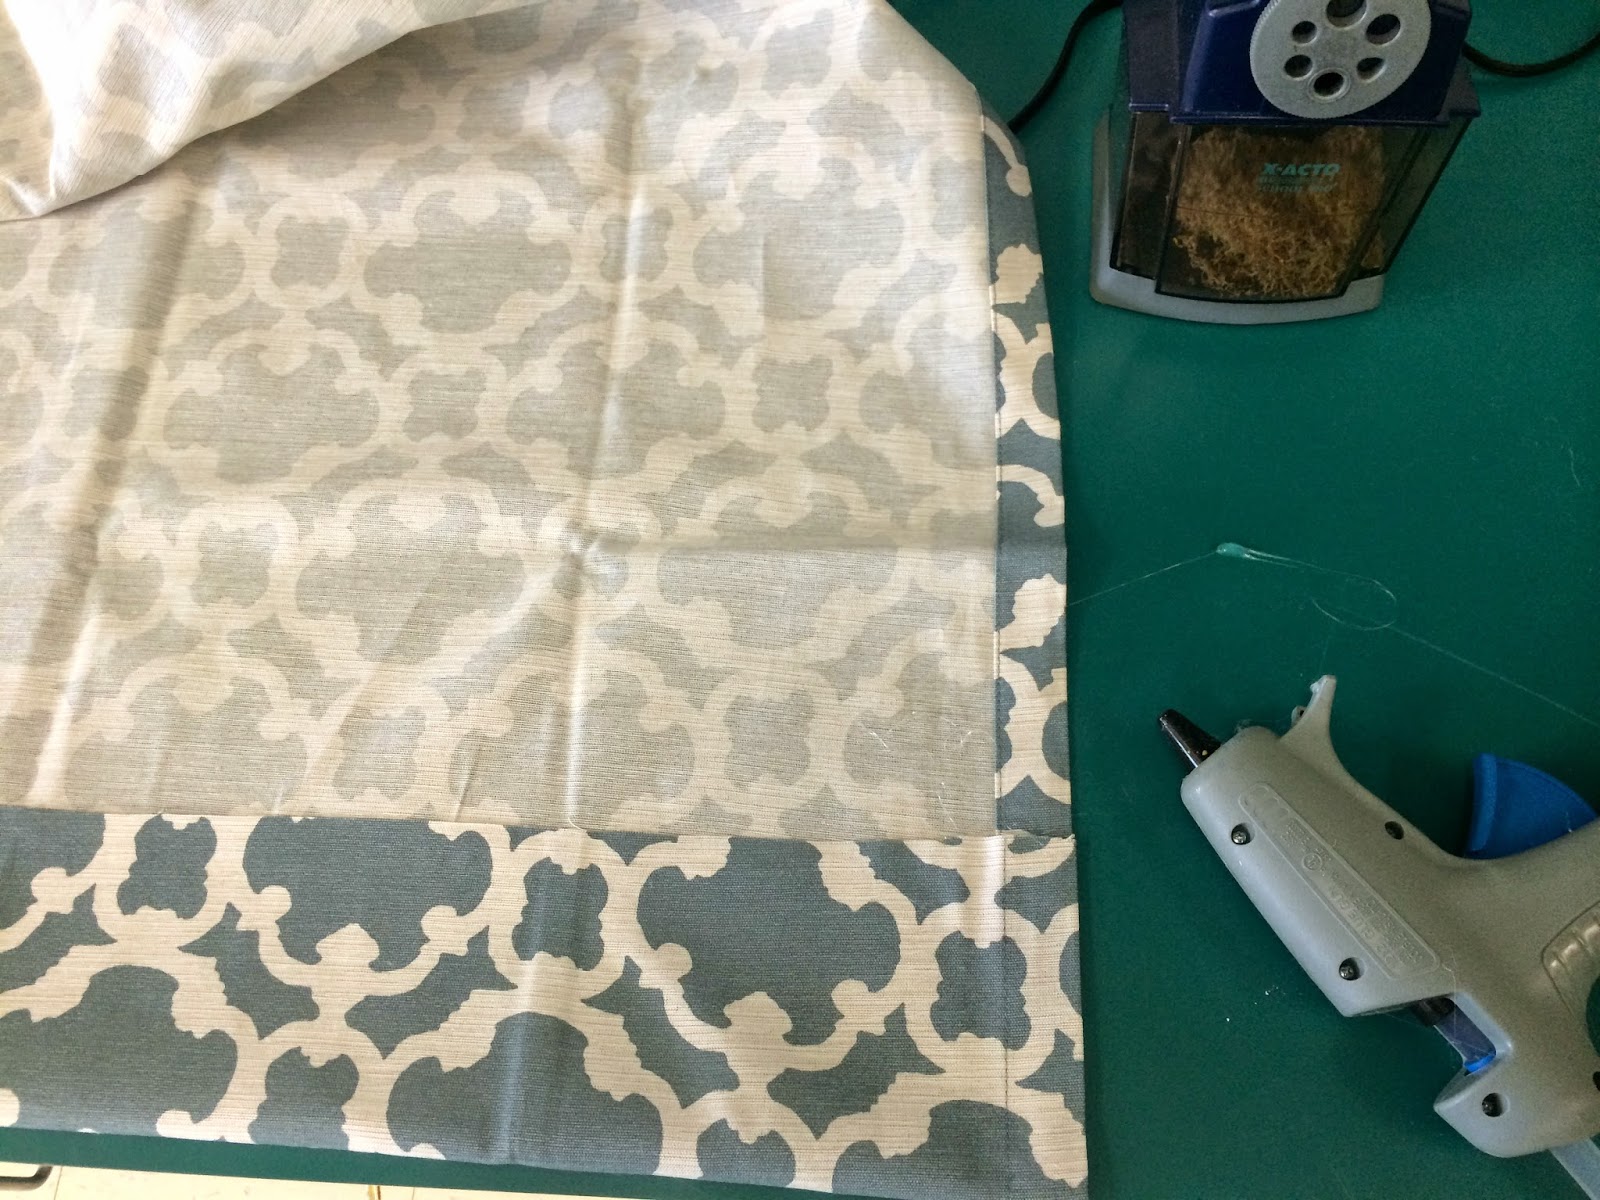
8. Cover Ups- I have so many supplies and books and materials I have collected over the years and it looks just messy messy messy! So, I took the same curtains I purchased from Target for $19.99 for my windows and cut them to fit my tables and counters to cover up all the messes. I didn't sew- oh no. I hot glued them and they look professionally sewn! Then I hot glued them to the tables and counters! Yes, I am a hot mess! I mean a hot glue crazy woman!
Mess #1
Mess #2
Mess #3
Fixed Mess #1
Fixed Mess #2
Fixed Mess #3
9. Collect Items- This is especially useful at the beginning of the year when I am collecting class supplies! I place bins and signs and they go at it! Of course if it was something I had to track, I would do it with a list instead of this way. It saved us lots of time that first day!
10. Group Supplies- I found these at Walmart and they are perfect! Each group has markers, color pens, colored pencils, a tape dispenser, glue sticks, and scissors. I have rules for the supplies! Markers need to be facing up to see the color. If a lid is missing, throw it away and get a new one from the class supply. Pencils are to placed point down to see the colors. Keep them sharpened and the bins neat! Click for similar ones.
I hope these classroom organization tips help you this year! If you have any tips that work well for you, please share! I would love to see what else I can do to make my job easier!
Do you need classroom management ideas?


I love seeing pictures of your classroom. It looks awesome and I enjoyed reading your organizational tips too. This is a great post! :)
ReplyDeleteI have to take pictures of my room! I am the pinterest queen this year. I have other teachers coming to see what I have done. A big problem last year was kids getting up for supplies. No more. I stole this from Pinterest, but I ziptied crates together and have them stacked. (Started with 2 per table group but moving to 4.) I have a table group supply bin made from a picnic table organizer, dictionaries, and the Basal readers that do not get used much. We are also keeping our data binders in a basket, which will sit in another crate. I just hate it when they keep junk in their desk and play with it during class or they can't find anything.
ReplyDeleteGreat idea!!!!!!
DeletePam, thank you for sharing these organizational ideas! Even though I've been teaching many years I think many of your organizational tips are better than the ones I have in place! I can't wait to try some of these. Kim
ReplyDeleteThanks Kim! We have to learn from each other!
DeleteWhere can I find those mailbox cubbies?
ReplyDeleteThis comment has been removed by the author.
DeleteHi Petrina!
DeleteLook on Amazon! I looked up Classroom mailbox and there are several!
Pam
Great ideas! How do you rotate your helpers every month- Randomly or in order? Are the partners always the same?
ReplyDeleteI rotated them in order ( just to keep it simple for me!) I kept the partners the same except for two. One set of partners weren't getting along so I switched them. Gotta do what we gotta do to keep the sanity!
DeleteWhere did you find the helper printable? Did you create it?
DeleteThis comment has been removed by the author.
ReplyDeleteI love all of these ideas. Could you share the link for the pattern for the window shade? Thanks!
ReplyDeleteWhere can I find your team job cards? TPT?
ReplyDeleteThese are wonderful suggestions! Thank you so much for sharing and for the pictures!
ReplyDeleteI love these ideas. Do you have the directions for the door window shade?
ReplyDeleteI also love your window shade, and am wanting to make one for my classroom. I love the idea of tying up the fabric, and just untying when needed. I have a black piece of construction paper that I have to keep track of, and get quickly up on my door during a drill. I was wondering if the fabric was very heavy or if you put any type of weight at the bottom of the fabric somehow. I thought it might be flapping around and not really provide protection. I appreciate any help you can give me! Thanks!
ReplyDeleteI also love your window shade, and am wanting to make one for my classroom. I love the idea of tying up the fabric, and just untying when needed. I have a black piece of construction paper that I have to keep track of, and get quickly up on my door during a drill. I was wondering if the fabric was very heavy or if you put any type of weight at the bottom of the fabric somehow. I thought it might be flapping around and not really provide protection. I appreciate any help you can give me! Thanks!
ReplyDelete