I am doing a video on this for Teachers Notebook. I hope it turns out ok! Here is the nuts and bolts of my presentation:
The lesson that I am presenting is taking a roller coaster ride through the Writing Process of Common Core Narrative Writing. This works really well with upper elementary. I start off my year by setting up our writing notebooks. We spend a lot of time brainstorming ideas for writing. I use a heart to have them think of things they love, a capital I for things about themselves, a house to think of family, etc.
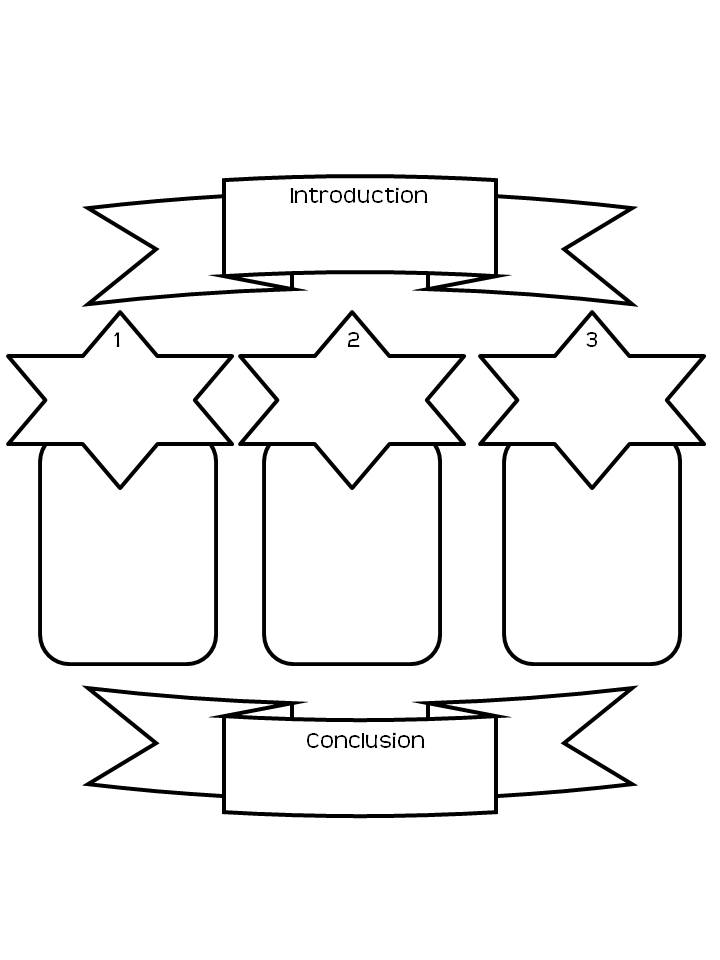
We also do an interest inventory. Then we move into paragraph writing utilizing the hamburger model.
The top bun is the introduction, the burger, lettuce and tomato are details and the bottom bun is the conclusion. Once they have a solid understanding of these skills, I move into task, audience and purpose. This is an important standard that I like to cover in all of the writing pieces throughout the year. Then I begin by sharing the Narrative Writing elements and Common Core standards with them. I give them a copy of these in checklist form to add to their notebooks.
I like to have a mentor text with my mini lessons. For this one, I read Uncle Jed’s Barbershop by Margaree King Mitchell which is a great example of narrative writing.
Then I start my multitude of mini lessons. I model each writing step on big chart paper as we go along. I like to have the students on the carpet with me for the mini lesson and modeling. I have to warn you, with all the mini lessons I teach on this first writing piece of the year, it will take a long time to actually get to the final copy! It is sooo worth it though and the students will have a great foundation of essay writing for the year. After each mini-lesson, students go back to their seats, add the Common Core standard into their notebooks, add any notes from the lesson, then work on their own writing piece. For this first one, I have students work in partners. It helps ease anxiety about writing. I explain that they need to think deeply about their choices and be able to explain them to me. This helps eliminate any silliness.
Step 1- Prewriting.

The first part of prewriting is brainstorming ideas. When brainstorming an idea for Narrative writing, we go back to the ideas section in our interactive notebooks. Don’t forget that talking “out loud” is great for the students! They get to hear your thought process! Once we have our main idea, we start crafting a plot together as a class and placing our ideas onto the graphic organizer. I have several graphic organizers they can choose from so that they can make it their own. I start by showing a quick video of a roller coaster ride and then display a picture of one. I explain that they are at the bottom of the coaster. This is the place to introduce the characters, setting, and general plot or problem. From there, we start climbing up the coaster by developing the characters and events. When we are getting near the top, there is increasing action and suspense being created in the story. Reaching the top is the climax of the story ahhhhhhh! This is the highest emotion or tension. As we go down the coaster, we have falling action that eventually results in a resolution.

INTRODUCTION
Now that they can see how the story is going to be put together, I begin with introductions. I have a mini lesson for Narrator and/or Characters: In the introduction, a narrator or main character should be introduced. I explain that all of the characters do not have to be introduced right away. However, I encourage students to introduce at least one. In the body of the paper, students can bring more characters in.
For the lesson on Settings, I read a Mentor Text called Working Cotton by Sherley Anne Williams. I choose a student to draw the setting for the class story. Other students can add details to it. Together as a class, we write a vivid description.
Once finished with these lessons on characters and settings, I pull out the whole group graphic organizer and we create the introduction together. Then I have students write their introductions with their partners. I always like to give them some kind of share time whether it is sharing with a small group or whole class. This is their favorite part!
BODY
The Body of the storyis the middle of the story where characters are developed and events show sequence with heightened suspense and climax. I take time to do a lesson on the Power of 3! There is something intriguing about the number 3! It is more effective than its neighbors. Two doesn’t seem to be enough and four seems to be too much!
~3 Little Pigs
~3rd time is a charm.
~3 strikes you’re out!
~3 Stooges
An effective essay has 5 paragraphs with 3 body paragraphs. It is the perfect amount of information or detail! After the lesson, I like the students to independently, think of 3 events that may be included in their essay but don’t share with partner yet! When finished, they can look at all of them and decide together. I also do a lesson on Building Suspense and Climax. And Developing Character: For developing Character, I include the Mentor Text: by Patricia Polacco, called Rotten Ritchie and the Ultimate Dare. We discuss the development of Rotten Ritchie and I explain the reasoning for developing character. I share a list of character traits and we work on developing our characters in our story. Next we talk about Dialogue: the Mentor Text I use is If Not for the Cat by Jack Prelutsky. I go over the rules for dialogue and how it should be used. I also like to play that oldie but goodie song called You talk to much. It is A CUTE way to introduce the lesson. After we create dialogue for some of our characters, we write the body of the story onto the graphic organizer. Students do the same in partners. AND of course we share!
CONCLUSION
Next is the Conclusion I use a finish line clipart for this section. I explain how we need to end the story just like a roller coaster ride coming into the finish. I told you, this would take a long time! We only finished the graphic organizer and 2 weeks have gone by! We still have 5 more steps!
Step 2 is the Rough Draft For this step, I tell the students to just write. Don’t worry about spelling or other mistakes. Get your thoughts down. I ask them to skip lines to have room to revise later. When we write ours together as I class, I try to make mistakes and if students call me out, I say, “It’s ok! I will get it later. Let’s not lose our thought!”
Step 3 is DARE to Revise. Dare stands for Delete, Add, Rearrange, and Exchange.

When making revisions, I ask the students to use a color pen. The mentor text I use is Hooray for Diffendoofer Day by Jack Pretlutsky and Dr. Seuss. We look at the appendix to show students how famous authors find the need to revise! This is also the place I tell them about Roald Dahl and show his interactive hut online. The hut is where he did all of his writing. There is a trash can you can click with scribbled notes! The kids love it! I tell the students that even the best authors revise, edit, revise, edit over and over before they even think about the publishing stage. Mr. Dahl talks about this on an interview on his website. I always provide a student resource for the students that we place at the beginning of their notebooks and I tell them to use it during this step in the Writing Process. I go through each of the types of revising separately and stop and revise with the class and give them time with their own writing.
We start with D for delete. I show them how to cross off things that don’t stick to the topic. Then there is A for add. We add words to make it a better piece of writing. I share a lesson on transition words here. The mentor text I use is Through Grandpa’s Eyes by Patricia Maclanchian. The R is for Rearrange- where there may be an important piece of information but it needs to be moved to another location in the writing. Last there is E for Exchange- I do lessons on Rockin beginnings, million dollar words, variety of sentences, jammin conclusions, and crafting a title. Don’t forget to stop after each one to add standards, take notes, and revise the class and student essays. For Rockin Beginnings I use the Mentor Text: The Paper Crane by Molly Bang and The Very Hungry Caterpillar by Eric Carle . I also review a list of ways to make beginnings better and we craft a new one for our class essay. I like to have partners create their own beginnings separately and then share them with each other and choose the best one. For Million Dollar Words I use the Mentor Text: I Love You the Purplest by Barbara M. Joossee This is also located in their Student Resource. This is my favorite part! I have a Million dollar word bulletin board with similar references that is in their student resources. I also give them a thesaurus and a Million Dollar Dictionary as a resource. It contains amazing vocabulary to use in their writing and also has a place for them to write examples that they come up with along the way. We practice exchanging or adding adjectives, adverbs, figurative language to sentences. Once the students start working on their own piece, I walk around the room and look for student samples. When I find some million dollar examples, I hand out sentence strips and allow students to write their samples and place them on our bulletin board or post them in the room. For the Variety of Sentences lesson, I provide ways to rewrite sentences so they are not all starting the same way. This is also in their Student Resource. We practice some together before we fix our class and student essays. For Jammin Conclusions the Mentor Text I use is Owl Moon by Yolen I show them ways to make the end of their stories more interesting and we change our class and student essays. Don’t forget to share! For Crafting a Title I like the Mentor Text: My Rotten Redheaded Older Brother, by Patricia Polacco. After showing them ideas on how to make a more creative title, we fix our papers. Sound like a lot so far? Well I guarantee it is worth it!
Step 4 is CUPS.
CUPS is used to edit. It stands for capitalization, usage, punctuation, and spelling. A good Mentor Texts is Punctuation Takes a Vacation by Robin Pulver. The rules for these are in their student resource but we go through each one separately, add to notebooks, practice, fix the class paper, and then work in partners again. I ask students to use another colored pen for this step. If they want to use multiple colors, go for it! Whatever it takes for them to be excited over revising and editing works for me! For the spelling portion of CUPS, I have a free spelling dictionary in my store that you are welcome to download. This is a student version where there are frequently used words as well as a place to add words that they use often themselves. Don’t forget that National Punctuation Day is September 24th!
Step 5 is Peer Reflection: Partners exchange rough drafts with another set of partners. Have sticky notes and a writing checklist available for this step. I also have Peer reflection forms printed and available. Students should not write on each other’s papers. Instead, use sticky notes to write specific suggestions as they go through the writing checklist. Then, they each need to fill out a reflection form. I tell my students that it is their decision whether or not to use their peer’s advice.
Step 6 is the Final Copy: Depending on your instructions, students need to write final copies neatly. If they are handwriting the papers, I ask them to sit at a desk or table to help assure proper handwriting posture. I usually have them write this first paper in handwriting and save technology for later in the year.
When we retell the class story, I have a student create a character to the story and display a rollercoaster. As we read it, someone else moves the character up and down the rollercoaster! So there you go! Take a roller coaster ride through the writing process of a narrative piece! I know it sounds like a lot to do through one piece of writing but like I said before, it is worth it! When I move onto opinion writing and informative writing, I only need to refer back to the lessons or tweak them for that type of writing. If you need all of these materials that I suggest throughout this video, I sell Interactive Writing Notebooks in my store. I provide all of these lessons, cute teaching posters, bulletin board ideas, student printables, dictionaries, tracking charts, assessments as well as rubrics and reflection forms. It includes all the Writing standards. I hope you found this useful! Until next time…. Rockin Resources is out!