Theme Layout

Boxed or Wide or Framed

Theme Translation

Display Featured Slider

Featured Slider Styles

Display Grid Slider

Grid Slider Styles

Display Trending Posts

Display Author Bio

Display Instagram Footer

Powered by Blogger.

Display Author Bio

Theme Layout

Featured Posts

Grid Posts Slider

Trending Posts

About Author Bio

Recent Posts

Twitter Feed

Flickr Gallery

georgialoustudios

Search This Blog

favorite movie

Featured Posts

Grid Posts Slider

Trending Posts

About Author Bio

Recent Posts

Twitter Feed

Grid Slider Styles

Flickr Gallery

georgialoustudios

Grid Slider Styles

Display Author Bio

Theme Layout

Tuesday, July 15, 2014

10 Steps to Prepare for Writing Workshop

10 Steps to Prepare for Writing Workshop


Are you dreading the year because of writing?  Here are some great ideas for you to get your writing workshop ready to go!   I LOOOOVVVVEEEE writing and hope you will too after this post!

Supplies:
Composition Notebook for each student

2-3 prong pocket folder - 2 for each student

Clothespins (1 per student)
 or color ones:   


10 1 inch metal binder rings
  or color ones:        


2 binder clips


Chart paper 


Post Its or Redi-Tags:

  or       


Directions:

1. Print Free Spelling Dictionary and any writing resources you have for students.  

Place the resource pages in the fasteners and the spelling dictionary in one of the pockets in the folder.


A List of Students Resources helpful for Writing Workshop:

1.  1O Exciting Beginnings
2.  Power of 3
3.  Topic Sentence and Relevant Details
4.  Transition Words
5.  Importance of Sequence
6.  Million Dollar Words and Phrases
7.  Figurative Language
8.  Variety of Sentences
9.  Audience
10. Purpose
11. Dialogue
12. 10 Ways for Strong Conclusions
13. Capitalization Rules
14. Usage Rules
15. Punctuation Rules
16. Spelling Rules
17. Writing Process
18. Writing Checklist
19. Million Dollar Dictionary
20. Character Traits

If you need Students Resources, click below.  If you purchased an interactive 
notebook, Student Resources ARE included!


Free Spelling Dictionary!


2. Laminate and Post Writing Process Posters.
There are two versions that can be found in my store for free!  One for primary and one for upper elementary classrooms.  Laminate and place them on a writing bulletin board.  Use small metal binder rings or ribbon to attach each poster to the next.  Use large binder clips to attach them to the wall or bulletin board.  Don't staple them onto the board!  You want the posters to stick out so the clothespins will work effectively!  Write student names on the clothespins and instruct them to move their name down the bulletin board according to their current writing step.  You can paint your clothespins to match your decor or get the colored ones!  This will show where students are in the writing process at a quick glance.  It is especially helpful during teacher or peer conferencing.  

1.  Prewriting

2.  Rough Draft
3.  DARE to Revise
4.  CUPS for Editing
5.  Peer Reflection
6.  Final Copy      


3.  Create a space in the classroom for a writing center.   

Include:  
stapler
white out
markers
colorful pens/pencils
dictionary
thesaurus
tape
glue

4.  Print off writing anchor charts  

See below.  Use these resources in your writing center or bulletin board.  Laminate to preserve them for several years.  

5.  Create a poster or part of wall for students to write the titles of their published stories.  

Idea-  I've used chain links before too!  Anything works to show their hard work!

6.  Set up a Writer's Notebook

A.  Have students create a cover page.  Use clear packaging tape to seal it!  Volunteers work great for this project!


B.  Tabs:  Use a separate folder for resources.  I decided on two tabs.  (One for "Mini-lessons" and one for "My Own Writing")  We placed our "Ideas" section at the beginning without a tab.  Some teachers like a tab for this as well!   The Redi Tags are the easiest but more expensive than Post Its. 

Easy Way To Make Tabs with Post Its-  Take 2 colors of Post-It notes and cut them in strips.  I folded it over once.  Then tape one color strip onto the 6th page (leaving the first 5 pages for brainstorming ideas) and another color strip half-way through the notebook.  I used clear packaging tape and placed it on both sides of the tab and both sides of the page so it looks like it is a laminated piece.  We didn't even label the tabs and it worked great!


C.  Create a Table of Contents

We started our table of contents on the first page in "Mini-Lessons" and left three pages for recording the future table of contents pages.  As students learn the standards and the mini lessons, they number their pages and keep track on the Table of Contents page!


7.  Use the other folder for their published work.  (Final Copies)

        We call these our Writing Portfolios.  Collect everything that they have published throughout the year!  Poems, stories, writing across the curriculum, bulletin board pieces, etc.  Place them in a folder with brass fasteners.  Have volunteers file them each nine weeks and allow students to take them home for parent review.  At the end of the year, they get to keep their final product!  It is a great end-of-year gift!  Another great idea is to set them out on table during parent/teacher conferences so parents have something to look at while they are waiting.


8.  Post Writing Workshop schedule in your plan book.

10-15 min:          Mini Lesson

10 min:               Notebooking the lesson

30-60 min:          Independent writing, conferencing, peer reflections, guided writing

10 min:               Sharing

    
9.  Post Rules for Writing Workshop

A good visual to keep noise down is to get a block and write "Writer's Block" on it.  Tell your students that we want to avoid writer's block by keeping quiet.  If I raise the block, that means it is too noisy!  Have students initial it for ownership of the rule!

1.  Listen and share ideas during the lesson.
       2.  Writing time is quiet time.
       3.  Take risks in writing.
       4.  Keep notebook neat and organized.
       5.  Be prepared before meeting with your peer editor.

~Writers and peers may only have one conference per writing period.

~Writers:  Explain where you need help, then read your paper out loud to your editor.

~Peers:  Listen to the writer, fill out observation form, and give meaningful feedback.


10.  Presentations

      When student publish their writing, I like them to present their work whether it is in small group or whole group.  Their peers can evaluate them with presentation cards if you wish!  If you have an AUTHOR'S CHAIR, perfect!  


Now you are ready for writing workshop!  

If you are looking for a step-by-step writing approach TO BOOST TEST SCORES that includes anchor charts, forms, tracking, model samples, printables, rubrics, slides, posters, etc. etc.  Check out the all inclusive writing bundle: 


Just Anchor Charts:


Read more »
Unknown
4 Comments

Thursday, July 3, 2014

Friday, June 13, 2014

Keeping a Memory Book of Students

Keeping a Memory Book of Students


So much has happened since my last day of school a week ago!  Where do I even start?  You would think I would have all the time in the world to sit down and blog but not a second!  I am going to go back to the end of the school year to share something I do each year.  For the past 25 years, I have been keeping a memory book of my students.  It is so much easier to take pictures now than it was back in the day!  I would have to wait forever to finish a film roll and then get them developed.  By the time I got the pictures back, the memory was far gone.  Now, it is right at my finger tips!  Super easy.....no excuse!  My students love to look at the memory book.  What are their top 3 things they like the most? 

1.  The first thing they do is go back to the years when their siblings or friends were in my class to see them in my book.  It is so cute as they get excited to see them in this massive treasure!

2.  The next thing I hear is giggles.  Why?  Because they see my 80's hairdo!!!  Haaaaa!  My poodle hair!  They even question if it is me or not!  Ha!  I recently showed some of my colleagues this pictures and my "Hero" partner Roberta, who I call "Berta" laughed so hard she had tears in her eyes.  She wants to send it into Ellen.  We got on Youtube and she showed me some of Ellen's episodes where they reveal the bad hair.  It was hilarious! 

This isn't the one I have in the album-I left it at school- but you get the idea!:

3.  Their third favorite thing is to read cards and notes from my past students who are now grown up!  Each year, I keep a student address list.  When they graduate from high school, I send them a card along with a picture of them in my classroom.  I ask them to write to me and let me know what their plans are for the future.  Some of them come back to me because they have moved. :(  A few students continue to keep in touch over the years and even send me pictures of their own children!  It touches my heart.


Whether you are a first year teacher or a "seasoned" one, it is never too late to start a memory book!  It has been my prized possession and whenever I begin to get a little burned out, I flip through the pages and realize why I am teaching!  I love my students!

So why have I been so busy?  The day school got out, I had a flight to Pittsburgh to go help my sweet aunt get back into her house.  She was hospitalized two months ago and then had to live with her sister (who is also elderly) until I could get up there.  Since it was the end of school and I didn't have many personal days left, I told her I could come for a weekend, but I would be able to come for a week when school was out.  I left that very day we got out of school.  Since it is an 8 hour drive, I didn't want to waste a second so I flew.  Aunt Dolly never had children of her own.  She was married to my dad's brother and he passed away 5 years ago.  Last year, she lost her independence because her eye sight got so bad, she couldn't drive any more.  Then she was having pains and had slight heart attack.  While in the hospital, they realized she needed to be on oxygen.  She is NOT happy!  But the best thing about her is her amazing positive attitude!  She says, "It is what it is."  I wasn't sure what I was going to encounter getting up there.  I was praying I didn't have to put her in a nursing home.  God is good!  She is still very independent and isn't letting this stop her.  She is my inspiration every day!  She has a reader- magnifying glass with a light- to help her read and pay bills.  I didn't have to do that.  She has wonderful friends who take her grocery shopping, do her laundry, take her to doctors' appointments.  I didn't have to set that up.  She has all her finances and power of attorney in order.  Woo woo!  Sooooo, I basically had to help her get accustomed to her oxygen.  It was scary for both of us!  We tackled it with trial and error!  With the extra time, I cleaned up her balcony and got rid of all the winter junk and spiders so she can sit out there on nice days.  Then, my BFF came over and we painted her bathroom!  Aunt Dolly is not one to complain so you have to listen closely to remarks etc.  Last time I visited, she mentioned she was tired of the wallpaper in her bathroom for the last 40 years.  I had it on my list of things to do this summer when I visited.  Of course I couldn't tell her that!  She doesn't like anyone to do anything for her!  Dawn and I had to pretend we were just looking at it, then RrrrrrrIP!  We tore that wallpaper down and got to work!


I felt good about leaving because everything is in place for her.  AND I got her out and about!  However, my heart hurt and hurt bad to say good-bye!  I wanted to her to come live with us but of course she wouldn't have it.  Here is my sweet Aunt Dolly!

Now I am home for two days, driving my son to basketball and taking my daughter to minute clinic while trying to clean, do laundry, consoling a good friend with her husband in ICU, make appointments, etc AND get ready for vacation tomorrow!  Yes, we are going to Panama Beach, FL!  Woo woo!  I hope I don't sleep the whole time!  Like they say in the south, "This girl is WORN SLAP OUT!"  Stay tuned for fun photos!
Read more »
Unknown
2 Comments

Monday, June 2, 2014

10 Simple Steps to Making Chocolate Bars

10 Simple Steps to Making Chocolate Bars


Who loves chocolate?  Me me me me me me!!!!!! Did I say me?  Believe it or not but I am sitting in the dentist office with my daughter and what better way to distract myself than to think about delicious creamy chocolate!  I usually like to do a longer unit but ran out of time.  Does time fly for you too?  I scaled the unit down to my favorite lessons: reading Charlie and the Chocolate Factory, researching chocolate history with a web quest, and then making our very own chocolate bars!  Yuuuuummmmmm!!!!!!

This is what web quest looks like!   It works on a computer or Tablet.  For the tablets, I created scan codes for each question. My students love using the scan app!  

Excuse the mess!  It is the end of the year and my assistant principal needs to inventory materials!  Kids just seem to work around our little pig pen!    

Here is a link to the web quest: 
WEB QUEST

After the web quest, they got a little chocolate treat.  


The next day, it was time to make our very own scrumptilicous chocolate bars!  

STEPS TO MAKING CHOCOLATE BARS

Prep:
1.  Send out notice to parents for ingredients. I like to use www.signupgenius.com.  I will add a list of ingredients I usually ask for!
2.  The morning of making the chocolate, bring a crockpot, spatula, wooden spoon, and serving spoon.  
3.  Melt the chocolate chips on low.  Stir occasionally.  We were drooling from the smell of melted chocolate!!
4.  Set up the other ingredients in bowls around a table with a spoon for serving.
5.  Cut paper approximately 2 inches by 4 inches for labels.
6.  Prepare the foil.  Tear approximately 2 ft per student and fold it over once.  
7.  Tear out another piece of foil approximately 4 inches.
8.  Write each students' name on a quart sized baggie.

Making Bars:
1.  Create and color a unique label for your candy bar.  Set aside.  

2.  Students need to use the foil to create a shape of their choice leaving a hole to pour ingredients.

3. An adult will put your foil on a paper plate and place a scoop of creamy chocolate in the foil.  

4.  Next, fill your foil with your choice of ingredients!


5.  Then, stir ingredients together with a plastic spoon.  

6.  Take the smaller piece of foil and seal the opening.  


7.  Using thick clear packaging tape, tape the label on top.  

8.  Place foil in plastic bag.


9.  Last, place bag in refrigerator or cooler with ice to harden!

10.  When ready, guess what?  It is time for a taste!!!!!!

I promise your students will talk about it for years! Whenever I get a visit from a past student, they always mention our chocolate unit and I am known throughout the school as the teacher who makes chocolate!  In case you are wondering if I make one for myself, we'll hello?  Every year I make one for myself and I have my students who finish first make them for our principals!  Any kind of brown (chocolate) nosing works!

How do I keep children from tasting?  I let them taste!  I usually have so many ingredients.  I tell them ahead of time to keep their plates and spoons so I can give them some warm chocolate with ingredients left over to taste!  Happy campers!!!!!
Read more »
Unknown
0 Comments

Tuesday, May 27, 2014

Effective Way to Teach Students How to Give Book Report Presentations!

Effective Way to Teach Students How to Give Book Report Presentations!


Do you have trouble keeping students' attention during book report presentations?  Are your students ever so excited to present that it takes every ounce of energy from YOU to keep them calm?  Do they get squirmy, talkative, want to use the restroom?  Do they want to know when it is their turn?  I have had my share of exhaustion over the past 20 + years and would tackle one issue after another.  Trial and error.  Trial and error.  Well, here are some great tips that work well for my fourth graders and will work for you too!  Comment below if you have any additional great ideas!!!!!!!


You can snag this freebie to use for your classroom!  CLICK HERE FOR YOUR FREEBIE
Read more »
Unknown
0 Comments

Thursday, May 8, 2014

Headbandz Social Studies Review

Headbandz Social Studies Review


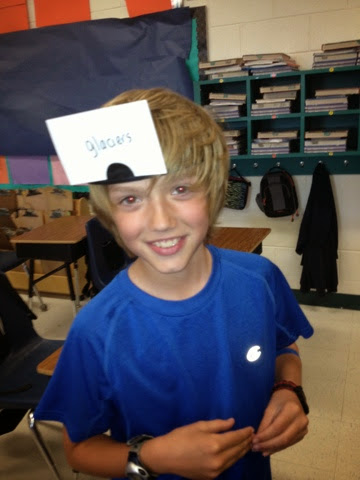
I am cracking up as I write this.  We had so much fun today.  It is easy to get grouchy since we have been testing all week and still have a last review for SS test tomorrow.  My computer is shot!  I had planned on playing the Jeopardy game I made to take the kids through all of our history lessons.  Well, our computer tech guy came in today of all days!  I really wanted him to take my computer though.  So what do you think I did? No I didn't highjack the Apple truck.  Silly beans.  I came up with last minute idea.  You know the drill!  We are constantly thinking, sleeping, waking up in the middle of the night, jotting ideas down.  When I told my students we weren't playing jeopardy, they started to complain until I explained the multiple meaning word "flexible."  I pretended to stretch then I explained my job requires flexibility.  I told them that I came up with a different game and they will enjoy it just as much!  I wrote words from our SS review on sticky notes by dividing them I colors.  Pink was people.  Yellow was groups of people. Green was places.  Blue was things.  Then I wrote each of our main units on the board.  I handed out the sticky notes and they had to group them according to the right unit.    Next I did a walk through history and we talked about each of the words ( of course we had to move a few because my brilliant little ones are not perfect).  Then I divided them up into 6 groups and gave one student a headband from the game Headbandz.  I handed out index cards with the same words on them.  They took turns guessing what word was in their head!  They could start by asking "Am I a person?". Then go on to say "Am I from the Revolutionary War?" and so on.  Fun!  The following pictures show us laughing and learning!  Now, it isn't the neatest thing in the world because I wa rushing but it certainly was a blast!   


Read more »
Unknown
0 Comments

Follow @georgialoustudios