Theme Layout

Boxed or Wide or Framed

Theme Translation

Display Featured Slider

Featured Slider Styles

Display Grid Slider

Grid Slider Styles

Display Trending Posts

Display Author Bio

Display Instagram Footer

Powered by Blogger.

Display Author Bio

Theme Layout

Featured Posts

Grid Posts Slider

Trending Posts

About Author Bio

Recent Posts

Twitter Feed

Flickr Gallery

georgialoustudios

Search This Blog

favorite movie

Featured Posts

Grid Posts Slider

Trending Posts

About Author Bio

Recent Posts

Twitter Feed

Grid Slider Styles

Flickr Gallery

georgialoustudios

Grid Slider Styles

Display Author Bio

Theme Layout

Monday, September 29, 2014

Hall Display to Last through the Year!

Hall Display to Last through the Year!


Boy oh boy has it been a busy beginning of the year!  Our school got ipads this year and every single second I am not teaching, I am working on that ipad to find amazing resources for my kiddos.  Overwhelmed?  That's an understatement!  And I love technology!  I just feel like I am starting over in a new grade or new school or something.  Ok, enough of my complaining.  I see the violins coming out.

Check this out!  My grade level was brainstorming ideas to put out in the hall for back to school.  In addition we were talking about putting up a background paper with the students name or something to keep up for the year where we can add their current papers.  With all kinds of nifty ideas throwing around this is what we decided.

1.  I used Whimsey Workshop clipart of a boy and girl and I erased part of their head so students could form their own.


2.  Then I added a cute frame and space to write an acrostic poem.  Students had to draw and color themselves and write an acrostic poem using their name.


3.  Then we took pictures of the kids and pasted them on a short piece of paper.  Students had to brainstorm numbers and words that represented them.

4.  We glued both pieces of work onto a long 12 X 18 piece of construction paper and laminated.


5.  Next we took four paperclips and put them a 1/4 inch above and inside each corner.  That way we can add current papers.  We taped the back to keep them in place.


6.  Last we put them up in the hall!


This is what it looks like when you add a new assignment:


When we take the assignment down and don't have a current paper to put in the hall, it will still look decorated!  Genius right?  I love looking at their drawings of themselves and comparing it to their actual photo.  I have some artists in here!  Toats Adorbs.  What does that mean?  That is my teenager's language for totally adorable!  What do you put in the hall at the beginning of the year?
Read more »
Unknown
0 Comments

Friday, September 26, 2014

Using Notability App

Using Notability App


NOTABILITY AND IPAD GIVEAWAY!!!!  Do you want to learn about Notability and enter to win an iPad mini?  This is for you!!!  My rockin Lesson Deli girls have teamed up to offer not only 16 incredible apps, but their expertise to go along with it!  Oh and let's not forget that since we are talking techie, we are raffling off an iPad mini so you can see what these apps can do for you and your classroom!  


Are you familiar with Notability?  If not, you need to check it out!
Notability is awesome to use in the classroom.  I teach 4th grade and this is our first year with 1:1 technology.  All my students have an iPad.  Reluctant at first, I decided just to dive into it and try things out.  We had a few bumps along the way but the app is amazing!  Students can take notes, record, upload pictures and documents, draw, write, make text boxes, highlight, etc etc.  I either email or place a document in my dropbox.  Student upload it into Notability.  Once it is in there, they can manipulate it.  I especially like that they can take notes and highlight text.  Our latest upload was a Native American chart.  Students create a text box in each box of the chart and write their notes.  Some liked writing instead.  They would zoom in to write so they could fit it all in the box.  Some change their screen to black and write with light color (I didn't even show them that tool!)  They are so excited about using the iPads that they explore on their own.


How did we manage the notes?  We created "DIVIDERS" for each subject.  Then we created "SUBJECTS" for each divider.  For example, under Social Studies, we have a subject for Native Americans.  They can create as many notes as we need and label each one.  It has been a fantastic tool for our first work.  I send them the .pdf and they can write answers directly on it.  Now I haven't felt completely comfortable in grading so if I am grading something, I may have them read and manipulate text on Notability but provide an answer sheet for their answers.  This chart you see above is going to be used for an open notes test on Native Americans.  It is saving us paper and engaging the students!  Now that you are excited to see what Notability to do for you and your class, enter our contest and win an iPad mini!  


See all the other amazing Lesson Deli blogs and their favorite apps below!

What is your favorite app????

Read more »
Unknown
4 Comments

Sunday, August 24, 2014

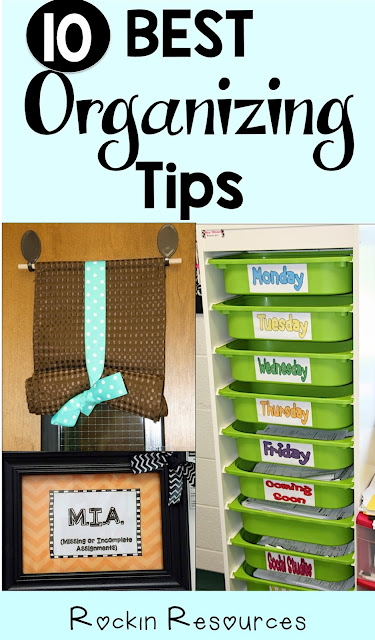
10 Best Organizing Tips for the Classroom

10 Best Organizing Tips for the Classroom


Although I've been teaching for a bajillion years, I still find that the littlest organizing tip goes a long way!   I am going to mix a few of my all time favorites with some of my new found treasures!  This is going to make my classroom run as smooth as silk!

1.  Class Mailboxes-  I have used these for years and they are best!  I assign each student a number in alphabetical order.  When turning in papers, I have students place the assignment in their mail slot and I can quickly check to see who didn't turn one in.  Then I can collect them in number order which makes it easy for entering grades!  Oh yeah!  I'm doing the happy dance.  Click for a link to where you can find it in Amazon!  I like the wood ones the best!


I also have a mailbox.  This is used for student notes as well as lunch money, bus notes. and other important information.  In the past, students put them on my desk, but if you saw my desk, you would see why I needed a new plan!  After misplacing a few items, it was time for a change!  I got this adorable designed box from Kirklands for 50% off and added a label to it.  Click on the picture for a link to similar ones from Pioneer.


2.  Door Window Shade-  Erin across the hall found this on Pinterest this year!  Another colleague, Meredith, made the shade for all of us.  Then we bought dowels, hooks, and ribbon at Walmart.  This is super effective for Lockdowns!  All you have to do is pull the bow and the shade falls down!  LOVE it!  Click for a link to the polka-dot ribbon!


3.  Leaving the Room Sign-  Also on the inside of my door, I posted this sign.  I laminated the colorful section and made copies of the signing part.  Then I tied a string to a pen and taped it to the door.  When students leave the room, they need to sign out.  Then when they return, they cross it off.  This is especially effective if we have a fire drill.  I can quickly check the list as we are lining up!  Although I usually remember who is out, there is always a panic as I'm counting heads and checking my clipboard for students at a quick second.


4.  Class Library- To keep order for my class books, I bought these baskets and labeled chapter books according to their genre.  I also place color-coded dots on the books with a letter so they can easily be placed back in the correct basket.  For example- M- Mystery.  Below there are fiction picture books on one side and nonfiction picture books on the other side.  Click the picture for a link to the baskets!


5.  Daily Lessons-  This is one of my favorite organizing tips of all time!  My partner, Roberta, found it at Ikea in the children's department.  I can place all the worksheets, plans, even books needed in these bins for each day of the week.  Below the days of the week, I place extra lessons or lessons coming in the future for my subjects.  Boy oh boy does this keep me organized!!!!!  Click on the picture for a link to the white frame!  Click HERE for the green drawers.


 6.  Jobs-  I have two classes.  I assign two students from each class to a job.  That way, if they are absent or out of the room, there is someone to perform the job.  I have two students from each class on vacation.  I allow them to sit back and watch others work!  (I even allow them to put their feet up, ha!)  My jobs include:  Geek Squad, Teacher Assistant, Cafe Team, Clean Team, Pencil Team, Board Team, Library Team, Cubbie Team, Library Team, Chairs Team, Floor Team, Supplies Team.  There is a description of their job duties on the chart.  I have students on the same job for the whole month.  That way I can keep track of their duties!   Then we rotate!  Click on the pic below for an editable version!  


Or keep them square:


Another idea for team work:  I place 4 different colors on the desks.  Below, you will see a pink cloud.  That is the color who will be the group helper for the day or week or month.  I move them whenever I feel like it!

7.  Missing Work Board-  MIA- Missing/Incomplete Assignments.  I place this on the white board so I can write names under it.  No Names- I clip any no names to this board.  Absent- If they are absent, I clip their work.  Incomplete work- I clip it.  In the middle there is a "Look What I Did" board.  I found this at Kirklands and although it doesn't go with the missing assignments, it was a space on the wall so I will highlight some Rockin Work!


This is a photo frame with magnets on the back and bow in corner.

I created the No Name and Absent Boards by painting an 11X 14 art canvas and hot glued the clothespins!  Then I hot glued them to the wall.  Click for a link to a Art Canvas- 7-pack.  


Below to the left is where I place incomplete work.  I took an old white board and covered it with wrapping paper!  To the right, I place extra worksheets incase a student messes up or loses work.


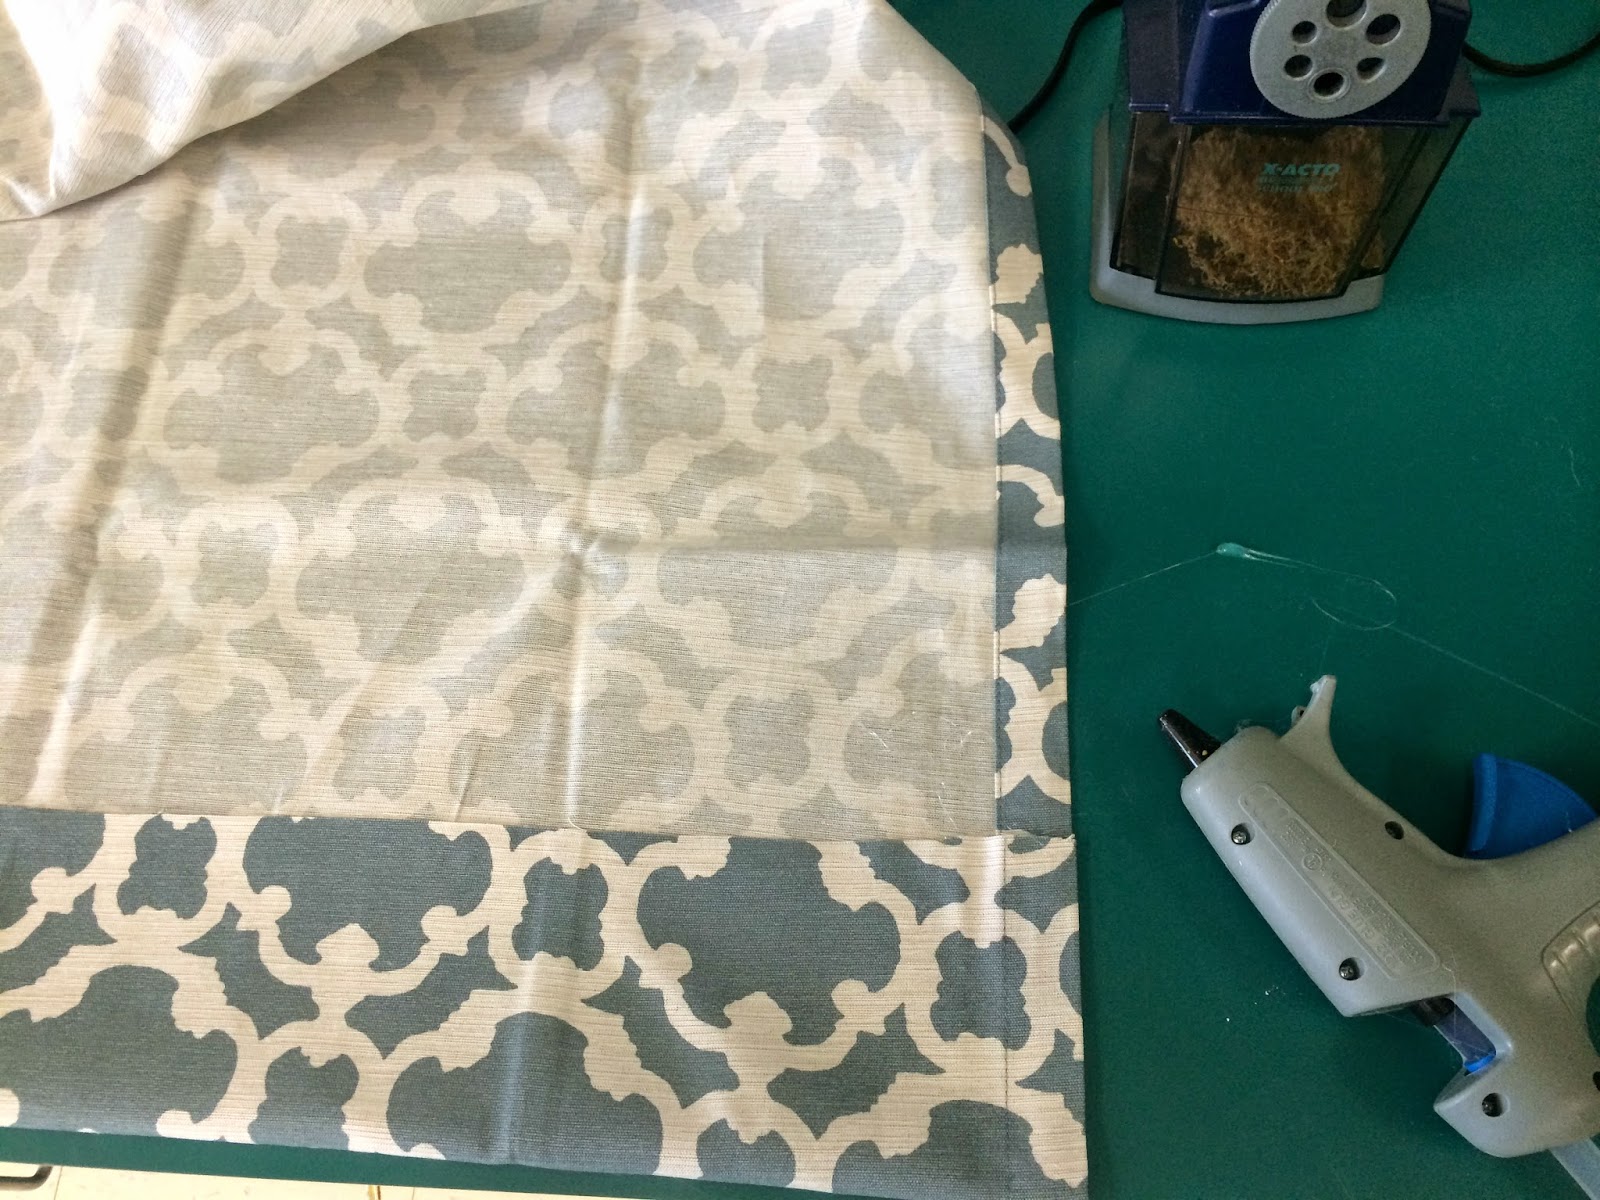
8.  Cover Ups-  I have so many supplies and books and materials I have collected over the years and it looks just messy messy messy!  So, I took the same curtains I purchased from Target for $19.99 for my windows and cut them to fit my tables and counters to cover up all the messes.  I didn't sew- oh no.  I hot glued them and they look professionally sewn!  Then I hot glued them to the tables and counters!  Yes, I am a hot mess!  I mean a hot glue crazy woman!


Mess #1


Mess #2

Mess #3

Fixed Mess #1

Fixed Mess #2

Fixed Mess #3

9.  Collect Items-  This is especially useful at the beginning of the year when I am collecting class supplies!  I place bins and signs and they go at it!  Of course if it was something I had to track, I would do it with a list instead of this way.  It saved us lots of time that first day!


10.  Group Supplies-  I found these at Walmart and they are perfect!  Each group has markers, color pens, colored pencils, a tape dispenser, glue sticks, and scissors.  I have rules for the supplies!  Markers need to be facing up to see the color.  If a lid is missing, throw it away and get a new one from the class supply.  Pencils are to placed point down to see the colors.  Keep them sharpened and the bins neat!  Click for similar ones.


I hope these classroom organization tips help you this year!  If you have any tips that work well for you, please share!  I would love to see what else I can do to make my job easier!


Do you need classroom management ideas?


Read more »
Unknown
18 Comments

Tuesday, August 19, 2014

A Few of My Favorite Things

A Few of My Favorite Things


Can you believe that it is time to welcome students through the door?  I had Meet the Teacher last night and got to see all those sweet faces!  I think I am finally ready but have one more day to work on little things.  In preparing for the coming weeks, I am super excited to share a few products that I came across.


First off, if you believe in Project-Based Learning, you need to skip on over to Plan a Field Trip from Performing in Fifth Grade.  She has several projects with different themes and even has a bundle of all her Project-Based Learning products.  This stretches students' minds and helps them explore their creativity.  LOVE IT!

Second, Teacher Next Door has an amazing Inference Bundle!  She uses Literature and Informational Text.  It is geared towards 4th-5th.  There are worksheets, task cards, posters, games and activities!  You get 124 pages of great resources for only $9!  Seriously?  You can't beat that!  This skill can be tough for elementary students and this will certainly help!  Inference Bundle


Next, I start off the year with Geography and Teaching Ideas 4 U has a fabulous interactive notebook for United States Geography.  It is for 5th grade but I can certainly tweak it for 4th.  Geography includes territories, latitude/longitude, regions, waterways, plains, etc, etc.  Can you believe you get all of this for only $4?


And to go along with interactive notebooking, my grade level just planned for the first couple weeks in Interactive Writing Notebooks.  Super Excited.  Last year, it was a huge hit with amazing results.  It is very teacher-friendly and walks you through Narrative-Opinion-Informative writing with tons and tons of mini-lessons!  Interactive Writing Notebooks

Now that you've heard about my favorite things, take advantage of TPT sale tomorrow!  


Read more »
Unknown
0 Comments

Thursday, August 14, 2014

Second Grade Interactive Notebook- Finally ready!

Second Grade Interactive Notebook- Finally ready!


I have been working and working and working on this second grade bundle.  OVER 400 PAGES!  I had a few customers who teach 2nd grade who kept looking at my other grade writing bundles and asked if I would do a 2nd grade one.  Whew!  I can now breathe and I am so happy to have it uploaded and ready for BACK TO SCHOOL!  I will give a description but first I want to let you know that it is 50% off until Friday- Aug.15th and 10 pm!  No lie!


My other grades have been best sellers on TPT. Now there is one for 2nd grade! It has hyperlinks to easily maneuver through the large document!

This year-long unit (407 pages) was designed to follow through the WRITING PROCESS and model lessons for Narrative Writing, Opinion Writing, and Informative Writing. It covers ALL of the Writing Common Core Standards and many Language Standards as well as essay writing. 

What is different about my product than other interactive writing notebooks?
There are teachable slides that can be used on the smart board or printed for posters, as well as student printables WITH STANDARDS to go along with each mini lesson. 

In addition to the multitude of lessons, you will find independent practice, model writing, assessments, student resources, graphic organizers, tracking charts, forms, rubrics, dictionaries, labels, homework assignments, etc etc. 

Getting Ready
Preparations
Setting Up Notebooks
Student Resources
Million Dollar Dictionary
Mini Lesson Instructions
Decorating notebook 
Portfolio Labels
Portfolio Message to Parents
Quick Notebook Check Rubric
Tracking Progress Form
Presentation Cards
Writing Workshop Rules

Developing ideas 
(Lesson plans, instruction posters 
and notebook printables)

Paragraph Writing Lessons
(Lesson Plans, Instruction Posters, Notebook 
printables, and Independent printable for each)
A. Subject and Predicates
B. Fragments
C. Complete Sentences
D. Topic Sentences
E. Relevant Details
F. Clincher
G. Assessment
H. Hamburger Model

Writing Process 
(Lesson plans, Posters and notebook printables)

Narrative Writing
(A sample is provided to model and follow through the writing process)
A. Lesson Plans
B. Narrative Elements
C. Narrative Writing CCSS Checklist
D. Prewriting
E. Brainstorming
F. Prewriting- Graphic Organizers 
G. Introduction (Character, Setting, Plot)
H. Body (Power of 3, Suspense, Climax)
I. Character Traits
J. Dialogue
K. Conclusions
L. Rough Draft
M. Writing Goal Form
N. DARE to revise (Delete, Add, Rearrange, Exchange) 
(more lessons on rockin beginnings, transition words, Million 
Dollar Words using money CLIPS (Colorful Adjectives, Lively 
Figurative Language, Ideal Adverbs, Powerful Verbs, Sizzling 
Sense Words) including bulletin board posters, trashcan 
words, sentence variety, jammin conclusion, crafty title) 
O. CUPS 
(lessons on capitalization, usage, complete 
sentences, punctuation, spelling), ASSESSMENT
P. Peer Reflection and form
Q. Final Copy
R. Samples of final copy paper
s. Rubric
T. Reflection Form
U. Homework/Classwork Printables

Opinion Writing 272-331
(A sample is provided to model and follow through the writing process)
A. Lesson Plans
B. Opinion Elements
C. Opinion Writing CCSS Checklist
D. Prewriting
E. Brainstorming
F. Graphic Organizer
G. Strengthen Opinions
H. Introduction 
I. Body (Power of 3, facts and details)
J. Conclusions
K. Rough Draft
L. Writing Goal Form
M. Revisions (lessons on rockin beginnings, 
supporting details, transition words, 
sentence variety, jammin conclusions, craft 
title)
N. CUPS (Revisit capitals, usage, punctuation, spelling)
O. Peer Reflection 
P. Final Copy 
Q. Rubric
R. Reflection Form
S. Homework/Classwork Printables

Informative Writing
(A sample is provided to model and follow through the writing process)
A. Lesson Plans
B. Informative Elements
C. Informative Writing CCSS Checklist
D. Assignment
E. Prewriting
F. Prewriting- Brainstorming
G. Graphic Organizer
H. Organization
I. Plagiarism, Taking Notes 
and Citing Sources with forms
J. Introduction 
K. Body (Power of 3, vocabulary)
L. Conclusions
M. Rough Draft
N. Writing Goal Form 
O Revisions (lessons on rockin beginnings,
supporting details, transition words, 
sentence variety, jammin conclusions, craft 
title)
P. CUPS (Revisit capitals, usage, punctuation, spelling)
Q. Graphics/Headings/Captions
R. Peer Reflection
S- Final Copy and Template
T- Glossary/Source/Table of Contents
U- Rubric
V. Reflection
W. Homework/Classwork Printables
More Practice/ Choice Assignment/Homework

Look no further! It is all here! If you are a new teacher, this resource is perfect. It is STEP by STEP and TEACHER-friendly. Instructions on how to teach the skills are included too!

CCSS: 
W.1, W.1.a, W.1.b, W.1.c, W.1.d, 
W.2, W.2.a, W.2.b, W.2.c, W.2.d
W.3, W.3.a, W.3.b, W.3.c, W.3.d, W.3.e, 
W.4, W.5, W.6, W.7, W.8, W.9, W.10
L.1, L.2, L.3

Read more »
Unknown
0 Comments

Sunday, August 10, 2014

DIY- Classroom Curtains

DIY- Classroom Curtains


DIY- Super Easy Classroom Curtains-  I am not kidding when I tell you it took me 5 minutes to do this!


1.  I bought one 84" long curtain from Target for $19.99.
2.  I cut it in half length-wise.
3.  I put the rod by the cut end.
4.  I hot glued the cut end over the rod.
Waaalllllaaa you are done!  Put those cute curtains up!

Some other friends on Facebook said they have used cheaper methods like material from Walmart, twin flat sheets, or shower curtains!  There is also Stitch Witchery you can use instead of hot glue!  

I love them so much I think I will create some to put on tables to hide my storage containers! 

Read more »
Unknown
0 Comments

Follow @georgialoustudios